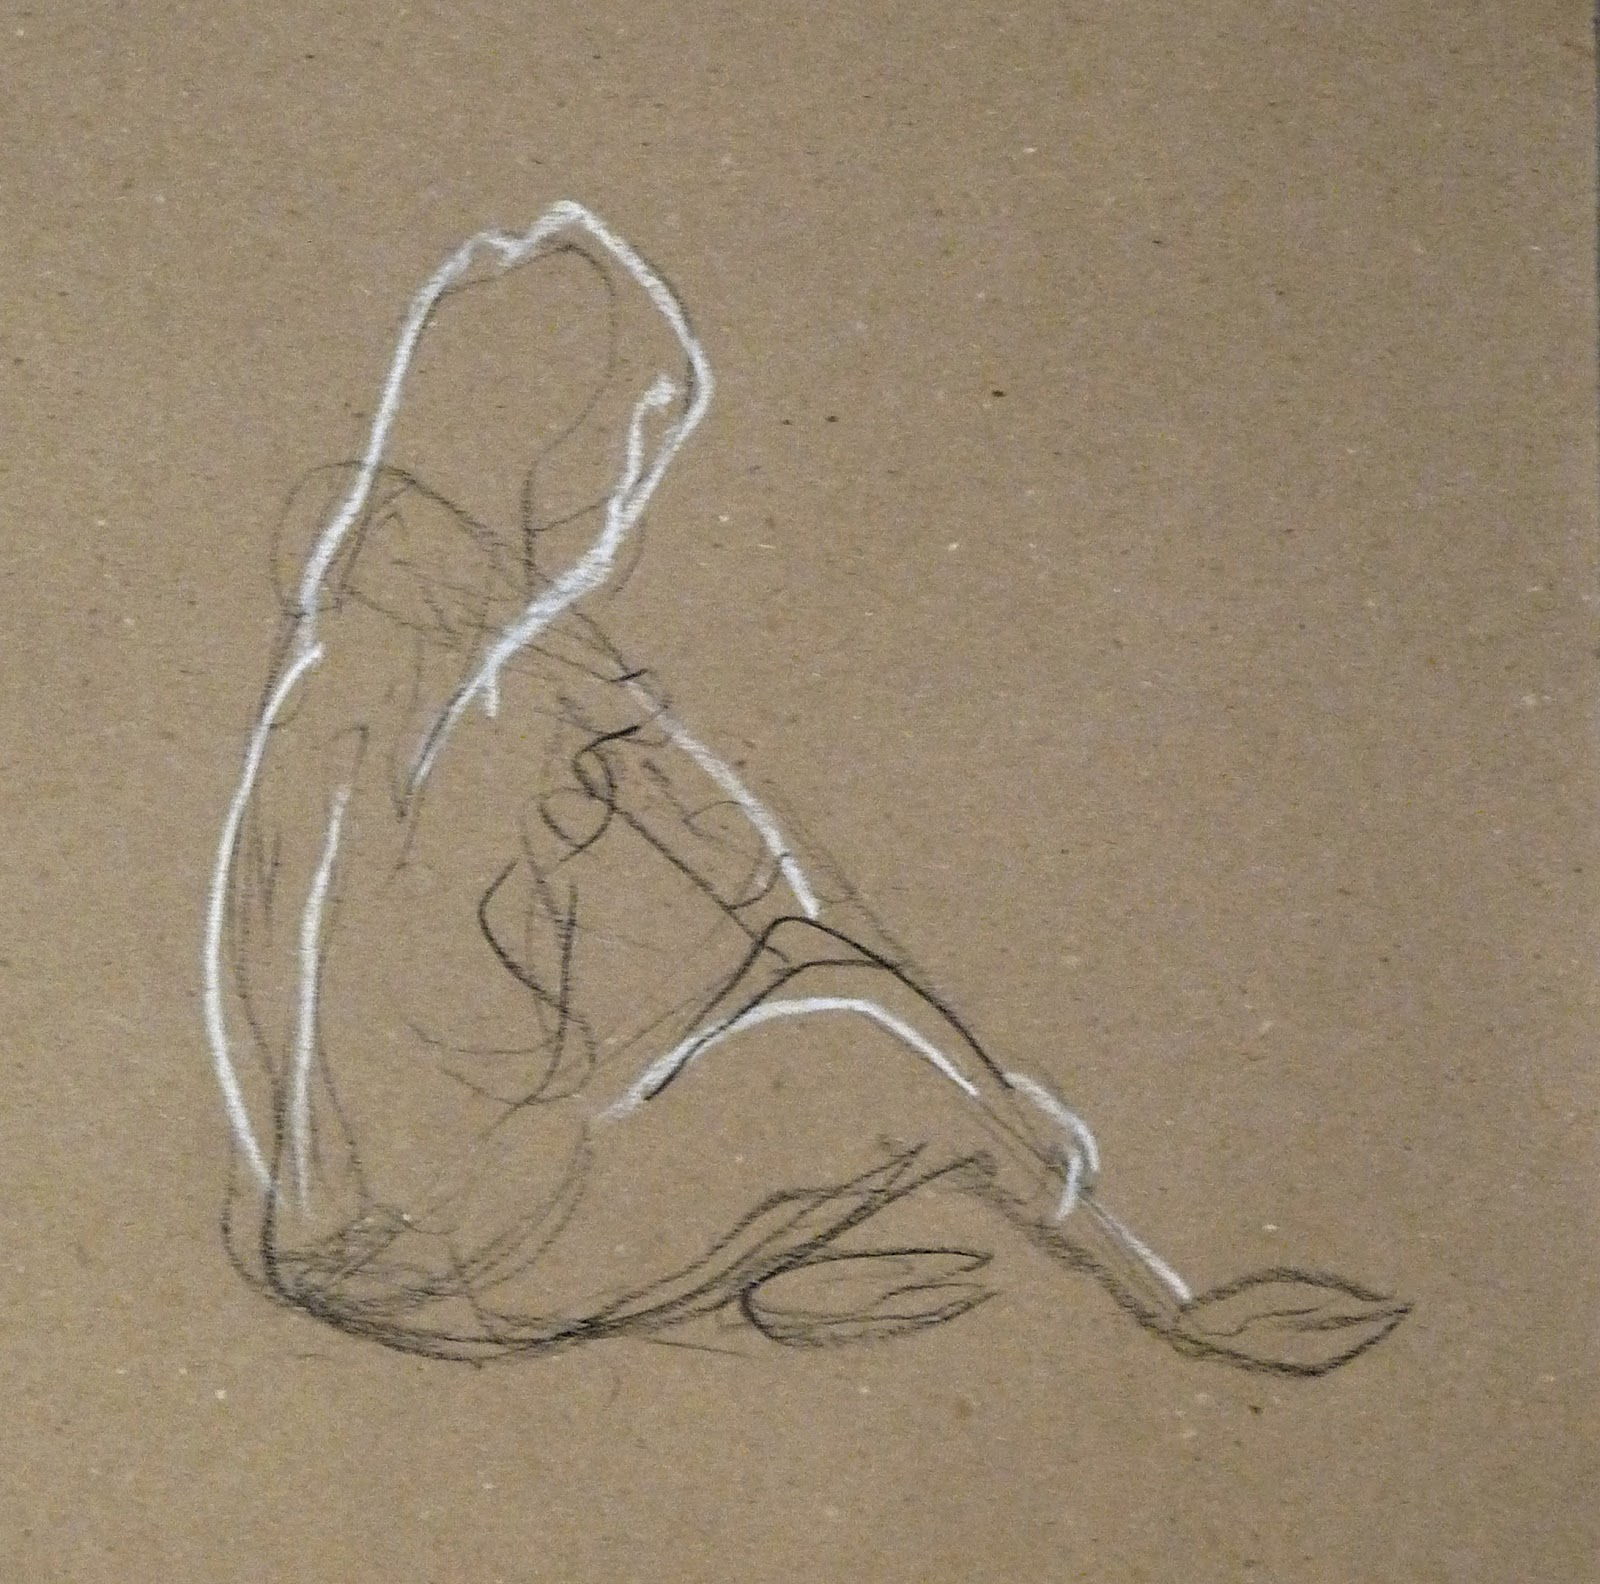
Sunday 30 December 2012

Coverack Harbour

Coverack Harbour
Watercolour on Paper
19cm x 28cm (7.5" x 11")

This is a view of Coverack harbour for which I posted some preliminary sketches in October (see Preparations for Coverack Harbour). In the original post, I was hopeful the painting would be finished by the next weekend. In retrospect, this was slightly optimistic.

It has been great to have some time over Christmas to finish this off and to catch up with some other painting.

Coverack is a fishing village on the Lizard peninsula in Cornwall. Elaine and I are planning a visit in the summer as part of our excursion to Cornwall and the Scilly Isles. The picture is based on some of David and Jane’s holiday photographs.

Sunday 23 December 2012

Happy Christmas 2012

Bearing Gifts
Watercolour on Paper
8cm x 11.5cm (3" x 4.5")

Wishing you peace and joy for Christmas and the New Year

Sunday 16 December 2012

Winter Landscapes

Snow On Old Hill
Watercolour on Paper
28cm x 18cm (11" x 7")

This is a view from the top of the hill that is the backdrop for Farm Boy Racer. It is further along the same track.

I painted this yesterday at the December meeting of the Shelford Group of Artists. The December get together is a good one to attend because everyone brings food to share. Elaine made some Raspberry Blondies (like brownies, but with white chocolate) for me to take, which went down very well.

Norwegian Island
Watercolour on Paper
28cm x 16cm (11" x 6.25")
 
The theme for the day was Winter Landscapes. Tony Slater provided his usual mix of wit and wisdom. He suggested chopping the bottom off Norwegian Island to move the horizon further away from the centre line.

The big news for the week is I’ve bought a work of art to celebrate my birthday. Its taken 6 months to find the right piece, but the wait was worthwhile. Thank you to everyone in my family who contributed – I appreciate your generosity.

Bright light to Samson by Stewart Edmondson
73cm x 73cm (29.75" 29.75")

This is Bright light to Samson by Stewart Edmondson, we bought it from the D'Art Gallery in Dartmouth.

Samson is a small, uninhabited island off the Scilly Isles. Elaine and I were thinking of visiting the Scillies next summer. Now we have even more of a reason.

Sunday 9 December 2012

The Head in Crayon


Head in Crayon - Section 20
4 December 2012
Conté Crayon on Paper
32cm x 41cm (12.5" x 16")

This isn’t a belated Halloween post and no, I am not recruiting the undead to pose for drawings.

This is my latest attempt at the Head in Crayon exercise from the Natural Way to Draw. The exercise uses the same tools and modelling techniques as the sustained study in crayon (see Sustained Study in Crayon and Try and Try Again), but does not include the preliminary gesture and contour studies.

The objective is to model the complexities of the human face, which is a challenge because you only have an hour. I focus on trying to create the impression of a three dimensional object and don’t bother too much about the accurate measurement and alignment of the features – which is my excuse for why the eyes are too close together.

I have a bit of a mental block about modelling with the white crayon, so I’ve struck a deal (with myself) that allows me to minimise the amount of white crayon in the sustained studies as long as I use it extensively in the head in crayon studies.

Christmas Cards 2012

Wendy Hedges has made Christmas cards from some of my paintings. They look stunning and really demonstrate how the right mount and frame can complete a picture. Thanks Wendy.

Sunday 2 December 2012

Scratching and Scraping

Winter Twigs
(Based on Geoff Kersey's Trees, Woodlands and Forests)
Watercolour on Paper
18cm x 15cm (7" x 6")

This is my interpretation of another demonstration from Geoff Kersey's third programme about “Trees, Woodlands and Forests” on The Painting and Drawing Channel.

In this demonstration, Geoff painted a dark background and then used a craft knife to scrape the branches and twigs out of the wet paint. He finished by continuing the branches on the white paper.

Timing is everything with this technique. If you scrape too early, the paint fills up the line. If you leave it too late the paint dries and will not scrape out in the same way.

Geoff used the craft knife to create a variety of line thicknesses, but I found it easier to use a pointed piece of plastic to scrape out the thicker lines. This is a tool recommended for the technique by Ann Blockley in her book “Watercolour Textures”.

Ann differentiates between the techniques of scraping (removing wet paint) and scratching (removing dry paint). Scraping wet paint creates the types of marks shown in the picture on this post.  Scratching off dry paint leaves a bright white highlight and requires a delicate touch to avoid gouging chunks out of the paper.

Sunday 25 November 2012

Warming Up

Autumn Glow
(Based on Geoff Kersey's Trees, Woodlands and Forests)
Watercolour on Paper
18cm x 15cm (7" x 6")

This is my interpretation of a demonstration by Geoff Kersey. It is from his third programme on “Trees, Woodlands and Forests” from The Painting and Drawing Chanel.

I tend to paint something from the Painting and Drawing channel as a warm up at the start of each painting session. It gives me a chance to get into a painting frame of mind and to muster my eye-hand coordination before working on one of my own paintings. It is also a good way to experiment and learn about other people's techniques.

The background in this picture is painted wet in wet. Geoff started by wetting the paper and then adding a yellow gold, a red gold and a purple. The colours merge into each other to create gentle transitions and a soft golden glow.

After the background was dry, Geoff used a dry brush technique to create the broken effect of the foliage. He applied stronger mixtures of the same colours (and an autumnal green) using the side of dry brush to skate along the surface of the rough paper.

He used a similar technique to create the broken texture on the trunk and branches to give the impression there are leaves in front of them. The final step was to add some opaque yellow leaves to increase this effect.

I’ve had a productive day - I painted the picture on this post, finished painting my Christmas cards and did some more work on the painting of Coverack Harbour (see Preparations for Coverack Harbour).

Sunday 18 November 2012

A Change of Plans

Unwinding
Watercolour, Gouache and Permanent Marker on Paper
18cm x 25.5cm (7" x 10")

I was planning to spend Saturday painting some Christmas cards and finishing the painting of Coverack Harbour that I started back in September (see Preparations for Coverack Harbour ). Instead, I was sidetracked into painting the picture at the top of this post.

On Friday evening, Elaine posed for three 5-minute Straight and Curved Lines studies. One of the drawings really appealed to me because a small number of lines captured the gesture of the pose and there was an interesting contrast in the way Elaine’s straight right leg crossed her curved left leg. On Saturday morning, I was more attracted to painting a simplified version of the drawing than to the activities I had planned, so we will have to buy Christmas cards.

Sustained Study - Section 20 - Contour Drawing
11 November 2012
Graphite Pencil on Tracing Paper
38cm x 37cm (15" x 14.5")

This is the contour drawing from the sustained study for Section 20. It is the closest I’ve come to a likeness of Elaine in these exercises. It is a shame it is on a tatty piece of tracing paper.

Sunday 11 November 2012

Ready For Christmas

Ready For Christmas
Watercolour on Paper
8cm x 11.5cm (3.25" x 4.5")

I know it’s a bit early for Christmas, but yesterday was the November Painting Day of the Shelford Group of Artists and Tony Slater’s topic for the day was Small Pictures for Christmas Cards/Presents.

Tony painted a sprig of holly in an attractive loose style and then offered the group advice on their paintings.

My subject for the day was this well-fed robin. One of my goals was to give an indication of feathers, without getting drawn into painting details with a fine brush. Before I started painting, I made some marks with a clear wax crayon in the direction of the feathers. The paint cannot stick to the wax and I hoped the textured wash would read as feathers. I made some more prominent wax marks on the background to represent plant stems, but perhaps they look more like falling snow.

After the paint was dry, my final touch was to add some Winsor and Newton Iridescent Medium to the snow and white plumage. Its effect is a more subtle version of the beloved classroom glue and glitter technique. Unfortunately, the effect is so subtle it doesn’t show up in the photo.

I will wish you a Happy Christmas, but lets leave it for a month.

Sunday 4 November 2012

Lighten Up

Sustained Study in Crayon 3 - Modelled Drawing
29 October 2012
Conté Crayon on Paper
33cm x 37cm (13" x 14.5")

This is my third sustained study in crayon. The first two studies are on Sustained Study in Crayon and Try and Try Again.

In this study (and the previous one), I spent too much time trying to make an accurately proportioned drawing – I sacrificed my initial reaction to the gesture of the pose to try to obtain accuracy and in the end didn’t achieve either. The result looks stiff and lacks emotional involvement.

I start another study this week and this time I am going to focus on keeping the gesture of the pose. I will try to make the drawing accurate, but this will be of secondary importance. I’m also going to make more use of the white crayon.

I feel guilty about posting this study. Elaine posed for it, but it is an inaccurate and unflattering representation.

Sunday 28 October 2012

Straight and Curved Lines

Sitting with a Twist
Straight and Curved Lines (5-Minute Pose)
26 October 2012
Graphite Pencil on Paper
20cm x 23cm (8" x 9")

Straight and Curved lines is the second new exercise in Section 19 of the Natural Way to Draw. It is part of a sequence of exercises intended to increase the student’s awareness of contrasts in movement, form and colour (see Contrasting Lines).

The exercise is a gesture study based on 1 and 5 minute poses. It uses an analysis based on straight and curved lines to simplify and emphasise the gesture. The first instruction is to find a line of movement that goes through the entire figure and decide whether it is straight or curved. The next step is to find complimentary lines of the other type that contrast with the main line of movement.

Lounging
Straight and Curved Lines (5-Minute Pose)
26 October 2012
Graphite Pencil on Paper
40.5cm x 21cm (16" x 8.25")

The exercise is performed in conjunction with an ordinary (Gesture Drawing) and each study feeds from the other.

In 1-minute poses, I tend to begin by looking for the defining line of movement and use this as the starting point for the drawing.

In 5-minute poses, I tend to make a quick gesture drawing, then look for the defining line of movement and its complimentary lines before using them to emphasise and refine the gesture.

Torso Twist
Straight and Curved Lines (1-Minute Pose)
26 October 2012
Graphite Pencil on Paper
16.5cm x 37cm (6.5" x 14.5")

This is an enjoyable exercise, which has come at the right time. I was in a gesture drawing rut and this exercise is helping me out of it.

Saturday 20 October 2012

Contrasting Lines

Sitting - Contrasting Lines
12 October 2012
Graphite Pencil on Paper
37cm x 27cm (14.5" x 10.5")

Section 19 of the Natural Way to Draw is called Analysis Through Design. Kimon Nicolaides explains the sequence of exercises are intended to intensify our awareness of contrast and lead to an understanding of some of the fundamental laws of painting. He doesn’t say much more than that. In keeping with the spirit of the book, it is left to us to develop our own understanding by completing the exercises.

The first exercise is called Contrasting Lines. It is based on 5 minute poses and is concerned with the contrast between straight and curved lines.

The initial instructions are to start by drawing a straight line to represent a contour on one side of the figure and then to proceed around the figure alternating straight and curved segments. In addition, whenever there is a straight line on one side of the figure, we should try to have a curved line on the other side.

The rules are relaxed slightly for the second appearance of the exercise. You don’t have to strictly alternate straight and curved lines, but in the end you should have about the same proportion of each.

Crawling - Contrasting Lines
12 October 2012
Graphite Pencil on Paper
40.5cm x 27cm (16" x 10.5")

The drawings on this post are from my second attempt at the exercise. They may look ropey, but they are significantly better than the first set.

I realise that quite a few of my lines are not emphatically curved or emphatically straight. I should have been more forceful in making my lines either straight or curved. I would like to have another go at the exercise, but I don’t think it appears again. I hope I can make use of this insight in the subsequent exercises.

Sunday 14 October 2012

Preparations for Coverack Harbour

Coverack Harbour - Underdrawing
Carbon Pencil on Paper
38cm x 28cm (15" x 11")

This is the underdrawing for a painting of Coverack harbour. It is inspired by one of David and Jane’s holiday photographs.

It is a complicated scene, so I decided to explore it and get ready for the painting by drawing a preliminary study.

In the first attempt, I tried taking detailed measurements and alignments from the photo. After a while, I realised I wasn’t enjoying myself and the result was dreadful. It was stilted, unappealing and the dimensions were all wrong.

I started again by making an extended gesture study (see Section 13). I made refinements and corrections as I went along, but I focused on capturing the atmosphere of the scene rather than getting bogged down by measuring. It was an enjoyable way to spend a couple of evenings in a hotel.

Coverack Harbour - Gesture Drawing
Graphite Pencil on Paper
42cm x 29.7cm (16.5" x 11.75")

I continued the steps of the sustained study by making a contour drawing on tracing paper placed over the gesture drawing. I then used the tracing paper to transfer the image to the watercolour paper.

The result is not a particularly accurate or detailed interpretation of the photograph, but it suits my needs. I want to create the impression of a jumbled mass of boats in the harbour. I will use the drawing as a guide to where to paint, but I am not going to follow it slavishly.

I hope the painting will be ready to post next weekend, but more likely it will be the one after that.

Sunday 7 October 2012

Waiting for the Rain - Summer 2012

Waiting for the Rain - Summer 2012
Mixed Media on Paper
22.5cm x 25.5cm (9" x 10")

It’s been a wet summer. Elaine and I saw these cows one afternoon in July by the side of the river Trent. It wasn’t raining, but the air was damp and a downpour was imminent. The cow at the front seemed resigned to getting soaked.

I tried a couple of experiments with this picture. The first was the background hedge. This uses the materials I experimented with in The Wild Wood. It is a mixture of watercolour, acrylic ink and granulation medium. The effect of the granulation medium is more obvious than in the Wild Wood pictures. I’m beginning to get the hang of what it does and how to use it.

The second experiment was to try to create the appearance of drizzle by glazing the picture with a thin wash of greyish gouache. It hasn’t turned out as I imagined, but it has done a good job of unifying the picture. Before I added the wash, a couple of the cows looked a bit stuck on. The wash has helped to integrate them into their surroundings.

The cows provided an interesting challenge in modelling to make them appear rounded, three dimensional and solid. This would have been a lot more daunting if I hadn't been studying The Natural Way to Draw.

Sunday 30 September 2012

Studies of Structure

Leg and Knee
15 September 2012
Graphite Pencil on Tracing Paper
23cm x 51cm (9" x 20")

Section 18 of the Natural Way to Draw contains a series of exercises that study the skeletal structure of the body in more detail than the Study of the Bones (see Study of the Bones and Skull and Bones).

The first exercise is a 1 hour study of the Hand and Arm. You start by drawing a 15-minute contour study. You place a piece of tracing paper over the contour drawing and spend the rest of the hour studying and drawing the bones using anatomical charts and text books as references.

There are similar exercises for:
  • The Shoulder Girdle
  • The Leg and Knee
  • The Foot
These exercises are quite different from most of the other exercises in the Natural Way to Draw, which require intense observation of a real subject. During the studies of structure, I spent more time studying Classic Human Anatomy by Valerie L. Winslow than looking at Elaine.

Before starting the exercises, I was unsure about the benefit of drawing the bones - why not just study the anatomical charts for an hour?

The drawing of the Leg and Knee supplies the answer to the question. It helps to identify the gaps in my understanding. By comparing the drawing with the anatomical charts I can see I’ve made the bones far too thick. I’d better pay more attention to this in the next study of the bones exercise.

Eye
15- Minute Contour Study
22 September 2012
Graphite Pencil on Paper
25.5cm x 35.5cm (10" x 14")

The studies of structure also include 15-minute contour studies of ears and eyes. These are more like the majority of the Natural Way to Draw exercises and involve some serious staring.

I have noticed some improvement in my drawings as I learn more about anatomy, but it is a slow process.

Sunday 23 September 2012

Try and Try Again


Sustained Study in Crayon 2 - Modelled Drawing
17 September 2012
Conté Crayon on Paper
46cm x 18cm (18" x 7")

The first sustained study in crayon (see Sustained Study in Crayon) lulled me into a false sense of security. I thought I had made a break through and the rest of the Natural Way to Draw was going to be easy - Silly rabbit.

The second sustained study in crayon started badly. I couldn’t get the relative measurements right in the extended gesture study. Elaine ended up with a pinhead and a strange elongated body.

At the start of the contour study, I made some adjustments, but by the end, the proportions were even worse.

I had to start the modelled study, by making more adjustments. I couldn’t get Elaine’s proportions right, but eventually got them close enough to make the modelling exercise worthwhile. There are still some major inconsistencies, but I quite like the result. It has a quirky charm.

The challenge of drawing this relatively simple pose has forced me to think about techniques for checking the body is in proportion and the various parts are correctly aligned. The Natural Way to Draw describes one system and Classic Human Anatomy by Valerie L. Winslow describes a number of others methods. One thing most of them have in common is they use a body part (normally the head) as a unit of measure.

These techniques are useful when drawing figures from memory or imagination such as in the Daily Composition or The Long Composition. They are also helpful as a reference when drawing from life. You know which parts of the body should be about the same size and you can check their actual sizes using the classic pencil in outstretched arm pose.

Sunday 16 September 2012

The Long Composition

Sandwich Bar
Long Composition - September 2012
Graphite Pencil on Paper
37cm x 28cm (14.5" x 11")

The Long Composition is another exercise from the Natural Way to Draw.

Like the Daily Composition (see Daily Composition and A Year of Daily Compositions), it is a gesture study drawn completely from memory.

The difference between the exercises is that the Long Composition is drawn over multiple days.

On the first day, you visit a location and observe your reaction to it. You start the drawing by making a record of these impressions. On subsequent days, you identify some weaknesses with the drawing, visit the location, study the areas of weakness in more detail and then add what you’ve learnt to the drawing. After a few days of refinement the paper gets messy, so you put a piece of tracing paper over it and continue drawing on that.

Nicolaides instructions are to treat the Long Composition as homework and to complete a drawing every week. I am taking a more relaxed approach by following his alternative suggestion to finish a Long Composition with each Schedule. For me, this translates into 1 drawing every 5 weeks, so each week I am swapping a couple of Daily Compositions for Long Compositions.

The description of the Long Composition answers a question that has been bothering me for over a year – What has this to do with composition? Nicolaides explains the first step in learning composition is to gather material to compose. He stresses a composition should come from an understanding of the subject. You start with the gesture which leads to the composition. You don't impose the so-called rules of composition on to the subject.

So far, I have completed 3 Long Compositions. They have each had their challenges.

Friday Evening at the Royal Oak was my first. The venue seemed ideal because I could study the pub over Elaine’s shoulder without looking too much like a crazy stalker. The trouble is we were drinking a bottle of wine while we were there, which didn’t help my powers of concentration.

Friday Evening at the Royal Oak
Long Composition - July 2012
Graphite Pencil on Paper
39cm x 23cm (15.5" x 9")

My second drawing was In the Kitchen. During the last session, I noticed the perspective on the cooker hob was wrong. I thought about redrawing it, but decided not to because there is a danger I could spend the rest of the course making endless improvements to the same study.

In the Kitchen
Long Composition - August 2012
Graphite Pencil on Paper
39cm x 23cm (15.5" x 9")

I completed Sandwich Bar on Friday. The difficulty with this one was I didn’t have time to study enough details while waiting for my sandwich. This time I noticed mistakes while I was making my final observations and decided not to correct them because it would involve a complete restart.

Next time I need to find a venue where I can sit and watch what’s going on without looking too odd and without drinking half a bottle of wine.

Sunday 9 September 2012

Capturing Light and Negative Painting

Hurst Point Lighthouse
Watercolour on Paper
35.5cm x 15cm (14" x 6")

Hurst Point Lighthouse and Hurst Castle are at the end of 1.5 mile shingle spit, which stretches from Milford on Sea out into the Solent.

They are less than a mile from the Isle of Wight, which provides the backdrop for this picture.

The little blue boat is the ferry between the Hurst Castle and Keyhaven. It has just set off on its way back to the mainland.

Earlier in the summer, Elaine and I visited the castle. We walked out along the spit and returned on the ferry. We used the ferry to add variety to our journey, not because we are idle or were in a hurry to get to the pub for lunch.

I painted the picture at Tony Slater's September workshop for the Shelford Group of Artists. The theme for the day was Capturing Light and Negative Painting. Tony demonstrated how he uses negative painting to create highlights by painting around an object instead of painting the object itself.

There are some elements of negative painting in the picture on this post:

  • I didn’t paint the sails of the boats in the background (you might need to zoom in to see them). I painted the Isle of Wight and the sea around them.
  • The roof of the ferry is just a gap in the grass with a shadow underneath it
  • The right hand edge of the lighthouse is created by the sky and the Isle of Wight.
  • The triangular roof is created by the stuff around it.

Tony started his painting by covering the paper with a pale preliminary wash so that some of the highlights have subtle tints rather than being the stark white of the paper. I used the same technique. The highlights in this painting aren’t white. They are pale pinks and blues, but they look white because of the more intense colours around them.

I didn’t manage the same productivity (4 paintings) as at the Fast and Loose  workshop, but I tried to keep the same spirit of spontaneity in the painting.

Sunday 2 September 2012

Gesture in Black and White

Sitting Holding One Leg - Gesture Drawing
2 September 2012
Conté Crayon on Paper
28cm x 26cm (11" x 10.25")

Section 17 of the Natural Way to Draw introduces the Gesture in Black and White as well as the Sustained Study in Crayon.

The Gesture in Black and White is drawn with black and white Conté crayons on cheap grey construction paper. Each drawing takes a minute or less. The instructions are almost the same as for the original gesture study (see Gesture Drawing), except you start drawing with one crayon and part way through the exercise you switch to the other.

Walking While  Looking At The Clouds - Gesture Drawing
2 September 2012
Conté Crayon on Paper
18cm x 38cm (7" x 15")

I like the idea of the exercise, but I am struggling to get to grips with it. The drawings on this post are more stilted than my gesture drawings in pencil. I need to loosen up.

The main problem is I am thinking too much. Swapping between the crayons is a distraction. Part of my attention is considering when to swap crayons when it should be focused on drawing the gesture.

Bowled Hand - Gesture Drawing
28 August 2012
Conté Crayon on Paper
25.5cm x 27cm (10" x 10.5")

The other problem is the instructions include a mind game. Nicolaides explains the Gesture in Black and White is not an exercise in light and dark. He suggests you will find you draw light areas in white and dark areas in black, but don’t think about it. So as well as thinking about when to swap crayons I am also thinking about whether an area is light or dark and whether to draw it in black or white.

The only solution is to go back to the original instructions. I am going to scribble like crazy for a minute. If I swap crayons and the dark bits are black and the light bits are white, great, but I am not going to waste time thinking about it.

Struggling to Stand - Gesture Drawing
8 August 2012
Conté Crayon on Paper
25.5cm x 27cm (10" x 10.5")

Sunday 26 August 2012

Sustained Study in Crayon

Sustained Study 5 (Clothed) - Modelled Drawing
18 August 2012
Conté Crayon on Paper
53cm x 27cm (21" x 10.5")

Section 17 of the Natural Way to Draw introduces exercises using black and white Conté crayons.

The Sustained Study in Crayon is a variation on the original Sustained Study exercise (see Section 13 and Sustained Study 3).

The instructions for the first two studies (the extended gesture study and the contour study) are the same as in the original exercise. The extended gesture study is drawn in pencil on paper. The contour study is drawn in pencil on tracing paper laid over the gesture study.

The modelled study is different. In the original sustained study, the modelled study is drawn in pencil on tracing paper laid over the contour study. In this exercise, the contour drawing is transferred to some cheap grey construction paper using the time-honoured technique of scribbling on the back of the tracing paper, laying it on the grey paper and drawing over the lines. The modelling is done in black and white.

The modelling technique is the same as in previous studies except the light areas are modelled in white and the dark areas modelled in black.

Sustained Study 5 (Nude) - Modelled Drawing
12 August 2012
Conté Crayon on Paper
53cm x 27cm (21" x 10.5")

The Conté crayons are great for modelling, but there is a danger the results are too pretty. On a couple of occasions, I found myself trying to create an attractive drawing. I had to remind myself that these are exercises. The objective is to focus on the model not the drawing and to imagine touching every part of the form. If the resulting drawing looks presentable, it is a bonus; it is not the goal of the exercise.

Sunday 19 August 2012

The Wild Wood

Wild Wood 3
Mixed Media on Paper
18.5cm x 12cm (7.25" x 4.75")

Recently I bought Watercolour Textures by Ann Blockley because of a recommendation on Jane Minter’s blog (http://janeminterssketchbook.blogspot.co.uk/).

The book is about creating textural effects using watercolour paint and a variety of other materials. Some of the techniques create actual physical texture by using gesso, texture paste or collage. Other techniques create the illusion of texture by manipulation of the paint.

The pictures on this post are the result of experimenting with some of the ideas.

Wild Wood 2
Mixed Media on Paper
19cm x 13.5cm (7.5" x 5.5")

I started the first picture by covering the paper with gesso and then with washes of blue and various greens. While they were wet, I added some sepia acrylic ink.

I dropped in more ink than I intended and it spread out wildly, so I used a colour shaper to tease it into the tree shapes. (What is a colour shaper? - A paintbrush with a rubber tip instead of a brush. Why did I buy one? - I can’t remember, but they are quire handy for jobs like this.)

Colour Shapers

The result was unexpectedly satisfying, so I messed around with the technique in the second and third paintings.

Wild Wood 1
Mixed Media on Paper
17cm x 13cm (6.75" x 5")

Once the initial washes were dry, I added some blue pastel and gouache to reinforce the skyholes and finished the pictures by suggesting a foreground.

Sunday 12 August 2012

Fast and Loose

Fifty Years Married
Watercolour on Paper
18cm x 28cm (7" x 11")

Yesterday was the first time I’ve painted with the Shelford Group of Artists since May.

Tony Slater's theme for the day was Fast and Loose. He challenged us to complete each painting in 30 minutes.

This was a tricky assignment for me because I do not paint quickly. I like to spend time drinking tea and thinking - mainly about what to do next, but sometimes just idle daydreaming.

I usually struggle to complete one painting in a day, but I rose to the challenge and finished four. The pictures on this post are my favourites.

What Trees Are These?
Watercolour on Paper
18cm x 23cm (7" x 9")

The couple at the top of the post were on the beach close to the Palace Pier in Brighton. I wish I could claim the title was mine, but this was David Bastable's suggestion.

The trees are near Coleton Fishacre on the Devon coast. They might be Scots Pine, but maybe not. I will inspect them more thoroughly when we next vist Dartmouth.

Sunday 5 August 2012

Skull and Bones

Not Quite Elaine
Extended Gesture Study - 24 July 2012
Graphite Pencil on Paper
41cm x 48cm (16" x 19")

Sections 14 ,15 and 16 of the Natural Way to Draw include a Study of the Head in Pencil. I interpreted the exercise as being an extended gesture drawing (see Extended Gesture Study of the Head), but they probably should have been modelled drawings.

I don't regret the mistake because the schedules include a lot of modelled drawing. I’ve benefited from the additional practice of trying to draw the gesture of Elaine's features and measuring the angles and relative dimensions of her head.

Section 16 includes a second Study of the Bones.

Study of the Bones 2
22 July 2012
Graphite Pencil on Paper
56cm x 28cm (22" x 11")

Nicolaides stresses the importance of approaching the exercise “lightly and casually”. I would struggle to do anything else - it is a surreal experience.

Sunday 29 July 2012

Sustained Study 3

Sustained Study 3 (Clothed) - Contour Drawing
30 June 2012
Graphite Pencil on Tracing Paper
57cm x 25.5cm (22.5" x 10")

The sustained study is an extended gesture drawing, a contour drawing and a modelled drawing of the same pose. The contour drawing is drawn on tracing paper laid over the extended gesture drawing and the modelled drawing is drawn on tracing paper laid over the contour drawing (see Section 13).

Sections 14 and 15 contain a nude and a clothed study of the same pose.

One of the biggest challenges is to find a pose that Elaine can hold for 18 25-minute sessions. If you are not allowed to move, even the most seemingly comfortable position becomes torture. After about 15 minutes in this pose, Elaine would lose all felling in her right arm. To remedy this I tried to let her know when I was focusing on her feet and legs so she could move her head and arm and shake some life back into them.

Sustained Study 3 (Clothed) - Modelled Drawing
21 July 2012
Graphite Pencil on Tracing Paper
57cm x 25.5cm (22.5" x 10")

Recreating a pose at the start of each session can also be tricky. Relatively minor changes in Elaine’s or my position can dramatically alter my view. Sometimes it is difficult to determine whether I’m in a different position, Elaine is in a different position or if just one of her limbs has shifted slightly. It can be like solving a particularly tricky spatial awareness puzzle.

Sustained Study 3 - Extended Gesture Drawing
25 June 2012
Graphite Pencil on Tracing Paper
57cm x 25.5cm (22.5" x 10")

I am extremely grateful to Elaine for all the time she spends in these poses and for allowing me to post the results.

Sunday 22 July 2012

Sky Washes 8, 9 and 10


Sky Wash 10
(Improve Your Skies in Watercolour - Demonstration 3)
Watercolour on Paper
25.5cm x 15cm (10" x 6")

These pictures are based on the demonstrations from Geoff Kersey's Improve Your Skies In Watercolour programme on The Painting and Drawing Channel.

The first two demonstrations (the second and third pictures on the post) are wet into wet skies.

Sky Wash 8
(Improve Your Skies in Watercolour - Demonstration 1)
Watercolour on Paper
25.5cm x 18.5cm (10" x 7.25")

I found it difficult to achieve results that look anything like the demonstrations. Geoff makes them look easy, but they are not. He suggests these skies need repeated practice and he is right.

The most difficult aspects to gauge are the wetness of the paper and the dilution of the paint. These factors govern how much the paint disperses and the strength of the resulting colours.

In both of these exercises I used paint that was too strong and added it while the paper was too wet.

I am not sure I would use either of these skies in a painting (even if I painted them perfectly), but trying to replicate them is a good way to practice wet into wet technique.

Sky Wash 9
(Improve Your Skies in Watercolour - Demonstration 2)
Watercolour on Paper
25.5cm x 17.5cm (10" x 6.75")

The third demonstration (the picture at the top of the post) is my favourite.

Geoff started by wetting the paper and leaving some dry patches as starting points for the clouds. He added the blue and blotted out some more cloud shapes with a paper towel. He then let the sky dry before adding the grey cloud shadows.

An important part of this sky (and most realistic skies) is that it appears lighter towards the horizon. One of the techniques Geoff uses to achieve this is to paint the top part of the sky when his brush is full of paint and the lower parts as it runs out.

Sunday 15 July 2012

Bessy’s Cove

Bessy's Cove
Watercolour on Paper
36cm x 25.5cm (14" x 10")

Bessy’s Cove is on the south coast of Cornwall. It is part of Prussia Cove and is a few miles east of Marazion.

The picture was inspired by a photo from Coast magazine of a stormy sky over Prussia Cove.

My intention was to paint the gesture of the coastline without going into too much detail.

I drew some preliminary thumbnail sketches. The first sketch was an experiment to decide between a portrait or landscape composition. The second, third and fourth sketches were all about understanding the shape of the shoreline and cliffs. I drew the last sketch to decide where to place the main elements and as a rehearsal for the real drawing.

Bessy's Cove - Thumbnail Sketches

This picture has given me an urge to paint some sea cliffs – which is a good excuse for another trip to the South West. Fortunately, Elaine enjoys walking on the coastal path. We could even rent a boat.