Sunday, 13 May 2012

Be Brave With Colour

English Bull Terrier
Watercolour on Paper
21.5cm x 26cm (8.5" x 10.25")

The subject for the May meeting of the Shelford Group of Artists was Be Brave with Colour. I’m not sure what I was expecting, but it wasn’t the exercise Tony Slater had planned. He started by laying a tarpaulin over the floor. We mixed up a load of paints, wet our paper and then tipped the contents of our palettes over the paper.

After the paint had settled and dried, we tried to identify imagery in the mixtures of colours. We spent the rest of the sessions bring these subjects to life.

I couldn’t see anything in my wash apart from a variety of animal faces - everything from a little bunny to a hippopotamus. Tony was keen on the hippopotamus, but I decided on the English Bull Terrier. The deciding factor was that I have a blurry photo of one on my laptop and I didn’t fancy painting a hippopotamus (or any animal) without some kind of reference material.

I developed the picture with the techniques I used when painting  Moo! and Jack. I was a little rusty and could benefit from watching Jean Haines' Amazing Ways with Watercolour DVD again.

It’s not a masterpiece, but that wasn’t the point of the exercise. It was a fun way to spend an afternoon and it’s inspired me to paint some more animals - I'm particularly inspired to model the physique of the dog.

Sunday, 6 May 2012

Tonal Studies


Porthmeor Beach
Watercolour on Paper
13.5cm x 18.5cm (5.25" x 7.25")

Maggie Latham is writing an informative series of tutorials about Exploring Colour in Watercolour. She is being very generous with her knowledge.

In the third post, she explores the use of water in creating tonal value.

For some time, I’ve intended to experiment with painting tonal sketches. Maggie’s tutorial has provided the spur for me to start. An extra incentive is I am spending a lot of time in hotels and I’ve been looking for something to do in the evenings. Until now, I have shied away from painting because of transporting my painting paraphernalia, but I can cope with the one brush and one tube of paint I need for this tutorial.

The first assignment is to paint a value scale from black to white in 10 steps – starting with almost pure pigment and then adding more and more water to create lighter and lighter greys.

Tonal Scales
Watercolour on Paper
28cm x 38cm (11" x 15")

In my first attempt (the leftmost), I added a brush full of water between each step. In the last few sections, I added more water because the mix wasn’t becoming light enough.

In the second attempt (the middle one), I added 2 brushes of water between each step.

In the third attempt (the rightmost), I started by adding one brush of water and gradually increased the amount of added water as I moved down the page.

I intend to repeat these scales using a more scientific approach. I will print a 10 step grey scale, and attempt to replicate the tones while making notes about how much water I add.

After the scales, the tutorial progresses to painting tonal sketches. Maggie’s guidance is to work without a preliminary pencil sketch and to build the pictures up in layers working from light to dark.

Saint Michael's Mount
Watercolour on Paper
18cm x 13cm (7" x 5")

The pictures on this post are coastal views from Devon and Cornwall. I painted them with a number 10 round brush. It would have been nice to use a rigger to create some finer lines, but I need to practice painting details with a larger brush.

Towards Stoke Fleming
Watercolour on Paper
18.5cm x 13cm (7.25" x 5")

When I am next away from home I will paint more of these studies. I may even start working on the rest of Maggie’s tutorials because if I can cope with packing 1 tube of paint, I must be able to manage 3 or 4 tubes.

Sunday, 29 April 2012

Sky Wash 6


Sky Wash 6
(The Mill on Kneeton Road)
Watercolour on Paper
28cm x 19cm (11" x 7.5")

This sky is based on a Terry Harrison sky from his Improve Your Trees in Watercolour programme on the Painting and Drawing Channel.

Terry wet the paper, loaded the brush with French Ultramarine Blue and then created a graded wash by painting horizontal stripes from the top without adding any more pigment. The intensity of the wash faded as his brush ran out of paint.

When the sky was still wet, he added a grey mixture to suggest the shadows at the bottom of the clouds and then created the cloud shapes by blotting them with a paper towel.

The graded wash technique that Terry used is different to the technique I used in Wash Swatches.  I think the method from the swatches provides a better approach to get a smooth colour transition, but Terry's technique gives more time to work on the clouds before the sky dries.

The foreground is the mill on Kneeton Road seen from across the fields.

Saturday, 21 April 2012

On The Mud


On The Mud
Watercolour on Paper
34cm x 52cm (13.5" x 20.5")

Wells-Next-The-Sea is an attractive harbour and tourist resort on the North Norfolk coast.

The harbour is about a mile from the sea. The channel that connects them shrinks to a trickle at low tide. Boats that are moored along the channel sink on to the sand as the tide goes out and float again as the tide comes in.

The stimulus for the picture was another idea from John’s Lovett's Studio Workshop post.  The objective was to incorporate empty space into the picture and to confine details to one part of the image.

On The Mud - Thumbnail Sketches

The composition is taken almost directly from of one of my reference photos. I made most of the design decisions by drawing different framing options on the photograph. I drew a couple of thumbnail sketches to experiment with some variations, but did not discover any improvements. The main benefits of drawing the thumbnails were to improve my understanding of the composition and to practice drawing it before starting work on the watercolour paper.

One of the things that attracted me to this scene was the opportunity to paint a large graded wash (see Wash Swatches).  I knew there was a fair chance that I would not get a perfect graduation of colour in such a large wash, but I anticipated that any imperfections would add atmosphere rather than spoil the painting.

Sunday, 15 April 2012

Farm Boy Racer

Farm Boy Racer
Watercolour on Paper
38cm x 28cm (15" x 11")

A local farm owner or tractor enthusiast owns a couple of lovely old tractors. I’ve never seen them out in the fields, but Elaine and I have run into them speeding along the local tracks.

I painted this at the first meeting of the Shelford Group of Artists since the Easter exhibition. The theme for the day was “Drawing with the Brush and Big Brush Techniques”. Tony Slater was keen we painted with our biggest brushes and without any preliminary pencil drawing.

I started by trying to draw the tractor in as few strokes as possible and then decided to make a gesture drawing to convey the tractor's lumbering speed and the sunlight reflecting on its grill.

It not easy to make a painting look quick and spontaneous – this was my fifth attempt. It took a couple of tries to get the basic drawing right and then a few more to sort out the details (or lack of them).

Sunday, 8 April 2012

Section 13


Sustained Study 1 - Contour Drawing
18 March 2012
Graphite Pencil on Tracing Paper
42cm x 51cm (16.5" x 20")

Yesterday I finished Section 13 of the Natural Way to Draw.

Section 13 is a milestone:
  • It is the halfway point
  • It pulls some of the threads of the course together into a single exercise (the sustained study)
  • It introduces the first exercise (the extended gesture study) that puts an emphasis on accurately drawing the proportions of the subject

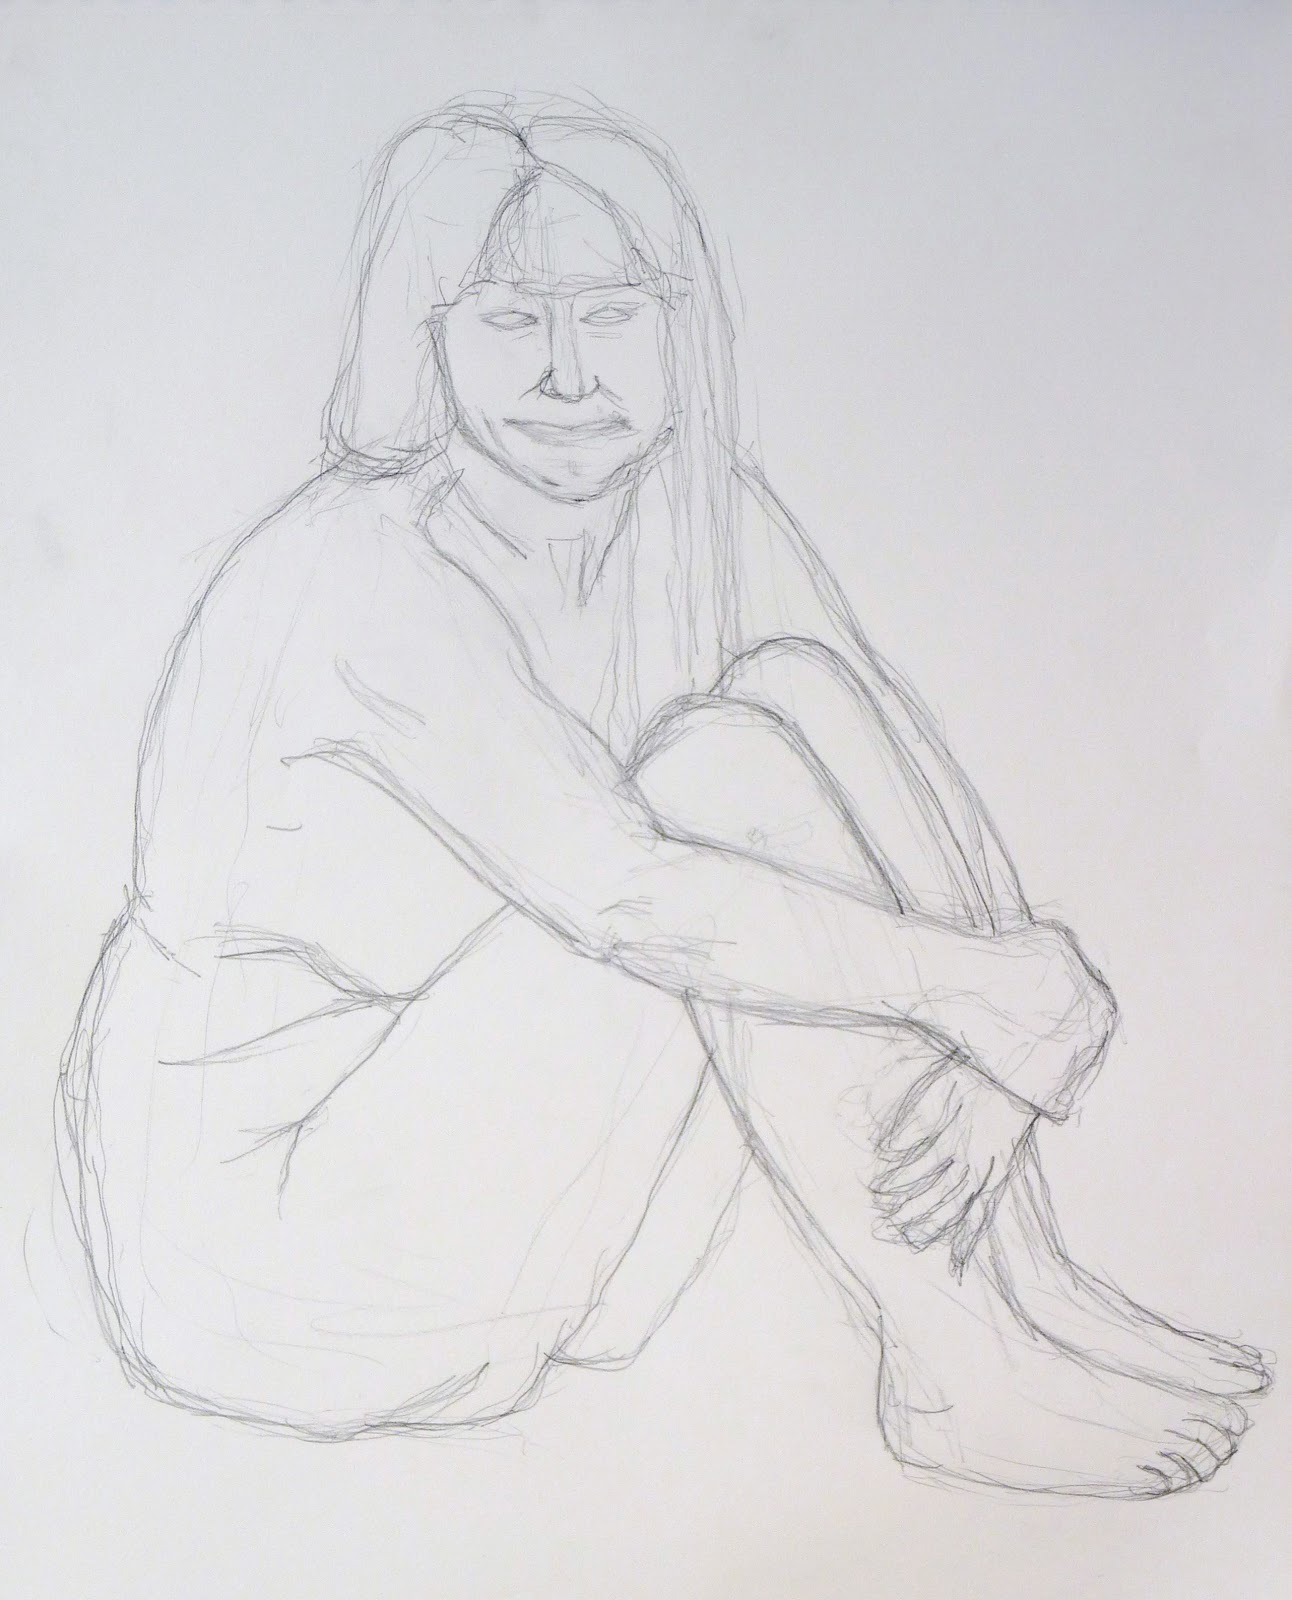
The extended gesture study is a half hour exercise. It beings with a normal gesture drawing (see Gesture Drawing). You then make the drawing more accurate by looking for alignments, measuring angles and relative dimensions. You can even erase lines if the drawing becomes confusing. The one stipulation is not to allow this analytical thinking to impose rigidity on to the drawing. You have to keep returning to the spirit of the gesture and draw what the subject is doing.

The sustained study is drawn in four 1-hour sessions. It starts with an extended gesture drawing. You then put a piece of tracing paper over the gesture drawing and make a contour drawing. The instructions for the contour drawing are the same as for the original exercise (see Contour Drawing) - you have to imagine a physical contact with the subject and only draw when you are looking at the subject. The difference is you can look at the paper more often and use the gesture drawing to help locate your position on the paper.

Sustained Study 1 - Extended Gesture Drawing
11 March 2012
Graphite Pencil on Paper
42cm x 51cm (16.5" x 20")

You then remove the gesture drawing, cover the contour drawing with another sheet of tracing paper and make a modelled drawing in pencil. The instructions are largely the same as for the earlier modelled drawings (see Modelled Drawing) with one important exception. In the original exercise, the lightest parts of the drawing are the parts of the subject that are closest to you. In the sustained study, the lightest parts of the drawing are the lightest parts of the subject.

Sustained Study 1 - Modelled Drawing
31 March 2012
Graphite Pencil on Tracing Paper
42cm x 51cm (16.5" x 20")

I am immensely grateful to Elaine for all the time she spends posing and for allowing me to post these pictures. The modelled drawing is particularly unflattering, but it is an important measure of my progress at the mid point of the course. I’ve come a long way, but there is still a long way to travel.


Sunday, 1 April 2012

Holiday Sketch

Relaxing
25 March 2012
Water-soluble Pencil, Ink and Watercolour on Paper
25.5cm x 13cm (10" x 5")

On Tuesday, Elaine and I returned from an incredible holiday in the Maldives. We took a week off from the Natural Way to Draw, which made the break even more relaxing.

I kept up with the Daily Composition exercise and somehow I found time to draw Elaine reclining on a sun lounger.

This drawing is loosely based on the Extended Gesture Study and the Sustained Study from Section 13 of the Natural Way to Draw.

The Sustained Study brings together gesture drawing, contour drawing and modelled drawing. It uses tracing paper to overlay the different techniques. In this picture, I have used all three techniques on a single piece of paper.

I started by drawing an extended gesture study in water-soluble pencil. I followed this up with a contour drawing in ink and then some modelling with the water-soluble pencils.

I used a wet paintbrush to blend and soften the pencil lines. When this was dry, I finished the sketch by adding some watercolour.

This was an interesting experiment and I plan to do some more sketching using this technique.

Next weekend, I will write a more detailed post about the Extended Gesture Study and the Sustained Study.